Photoshop is the ideal tool for enlarging your image files and get them ready for printing. Ideally you don't want to have to enlarge an image file but you may find that not all your images are large enough for the size you want. When ordering your fine art paper prints or canvas from us, if your image is not large enough you will likely get a message indicating that your file is too small for the size you selected to print. There is a way around this and that is to increase the resolution and size of the image. Results are going to be mixed dependent on how extreme you take the enlarging of the image.
Before I proceed, understand that we have software which runs our printers which does what I am describing below automatically but does it better than Photoshop. This means that what I am going to show you is unnecessary if you are printing your photos and image files through us but may be useful if you are printing yourself at home or through other labs.
Most people have heard of Photoshop and know it to be the go-to tool for graphics and photo enthusiasts. Because it is so widely used and easily available I am going to provide a simple tutorial that I think will help accomplish the goal of optimizing your image file for print. If you are serious about printing your artwork or photography and don't use a program like Photoshop, then you need to.
To get started you will want to have either Photoshop or Photoshop Elements. Fortunately both can be downloaded for free. Below are a couple links to the pages on the Adobe website. You will need to signup for an Adobe account but that is a small price to pay to get to use such powerful software for 30 days.
If those links do not work (Adobe likes to move things around), just do a search online for "trial versions of Photoshop" or "trial version of Photoshop Elements" and you should be able to easily find it.
As for which is best, my preference will always be with the full version of Photoshop which is now known as Photoshop CC. I have used Photoshop Elements in the past and found it adequare for the majority of things I like to do but I a dear personal friend that always would tell me "better to know it and not need it than need it and not know it.". Another way to say this is "better to have it and not need it than need it and not have it." In the case of Photoshop Elements, it has the majority of tools you will need but I have found on occasion tools that I would have assumed it included were not there.
Now you may already have a photo editor you like to use. I know there are a lot of them out there but you will need one that does allow you to enlarge the image file. Some have this ability neatly tucked away and difficult to find or simply don't allow it. Others programs which are similar in nature to Photoshop are programs like Gimp and Corel's Paintshop Pro. I don't have a lot of experience with Gimp which is free but Paintshop Pro is similar enough that you probably would be able to follow along with most of the steps below. You will need to hunt around on the interface to locate the tools and options but they should be familiar enough.
For the purpose of this tutorial I am working on my lap top which is a PC but the menu items will be the same on a MAC. So once you have downloaded and installed Photoshop, it's time to start up the program and follow along.
Step 1 – Determine Physical Size and Resolution
The first thing you want to do is check your image resoluton by going to Image > Image Size as shown in the screenshot below.
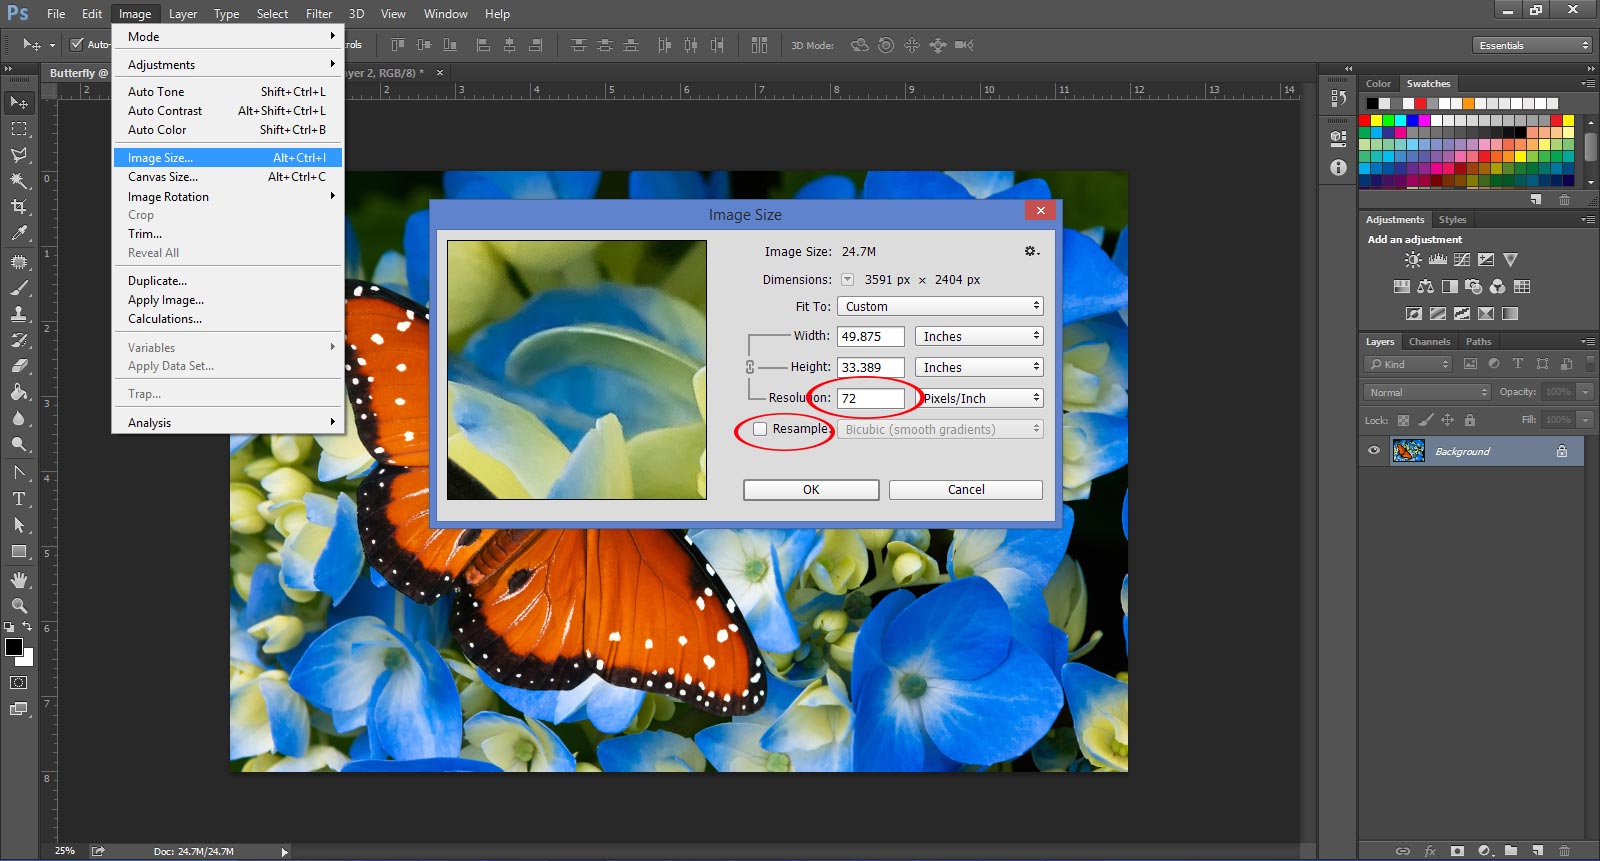
Notice how the size (width and height) say 49.875 x 33.389 inches. You may think, "wow, that is huge", but notice the resolution is only 72 pixels/inch. While it is within "acceptable" range for printing, it is far below ideal. If your image shows below 72 pixels/per inch then that is okay. Still follow along in Step 3.
Step 2 – Set Resolution to Optimal Print Quality
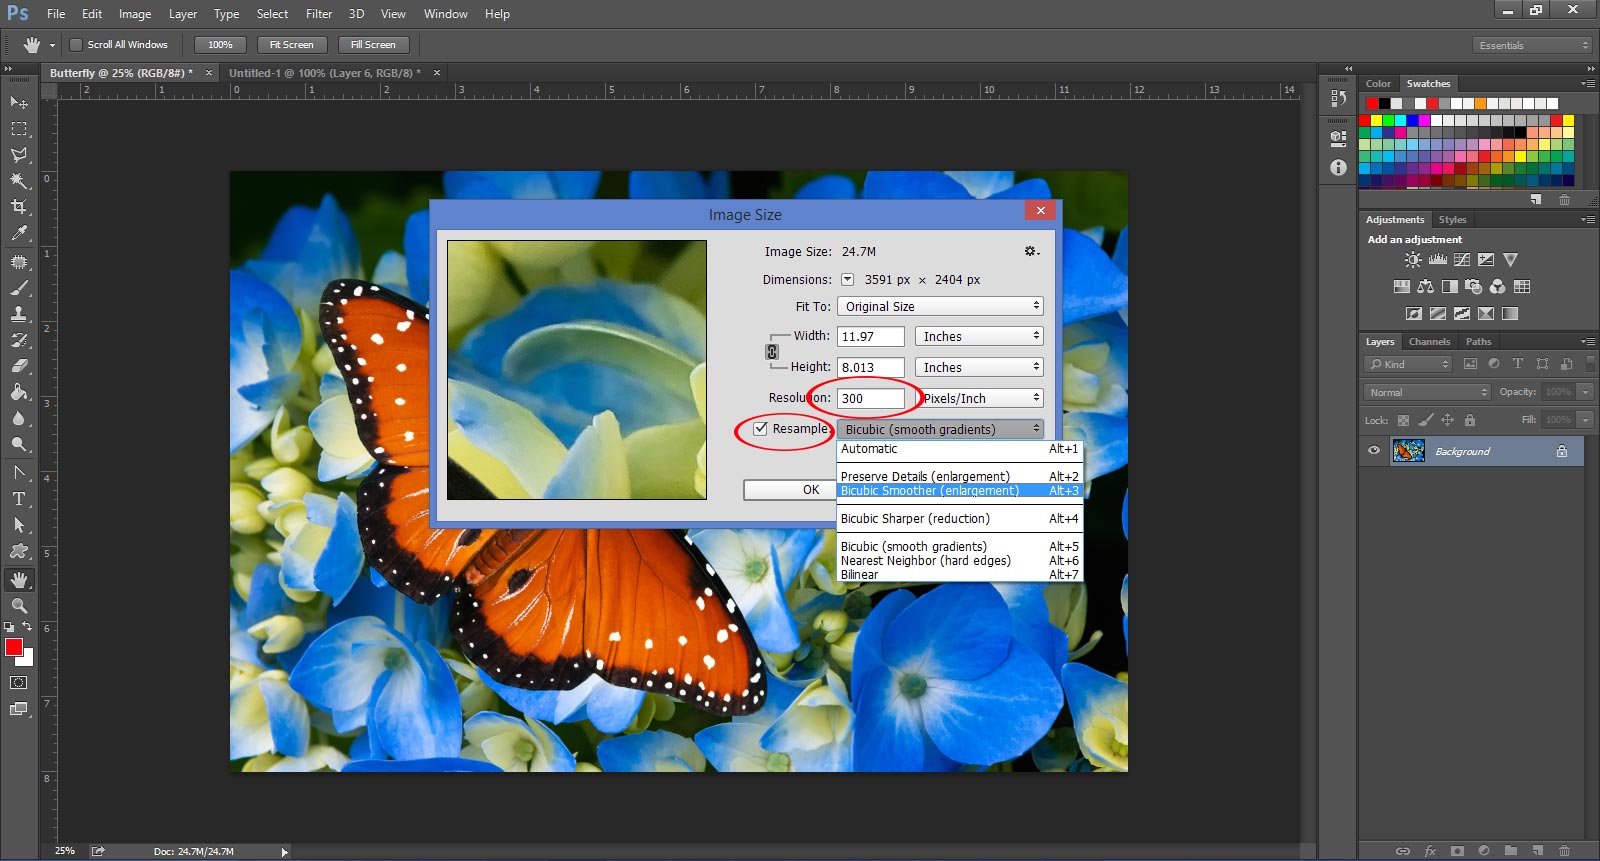
So now I am going to change the resolution to 300. If you are following along, make sure that you have the "Resample" unchecked, since right now we don't want to enlarge the image just yet. We want to see what happens when adjusting the file to the ideal resolution of 300 pixels/per inch. Notice that when I do this the image size gets smaller. At 300 pixels/inch which is ideal, my print size is only going to be 11.97×8.013 inches. That is a big difference!

Step 3 – Resample Your Image
Resample is a fancy term for "resizing". You may find that this size is ideal for what you want to print but what should you do if you want to print larger but feel 72 pixels/inch is too low. The good news is Photoshop does have the means of enalrging image files by creating more image data fairly accurately. Just bear in mind that the more extreme the size increase the less sharp your image will be.
To accomplish this, you will want to "Check" the resample box. Next to it is a drop down. In this case select "Bicubic Smoother" if it is available. If you don't have this option, select the "Bicubic" option you do have. Most image editors that allow resizing of photos will have a Bicubic option or two. Avoid using things that say Biliear or Nearest Neighbor since those will not do as well a job.
Step 3 – Setting the Physical Dimensions You Want to Print
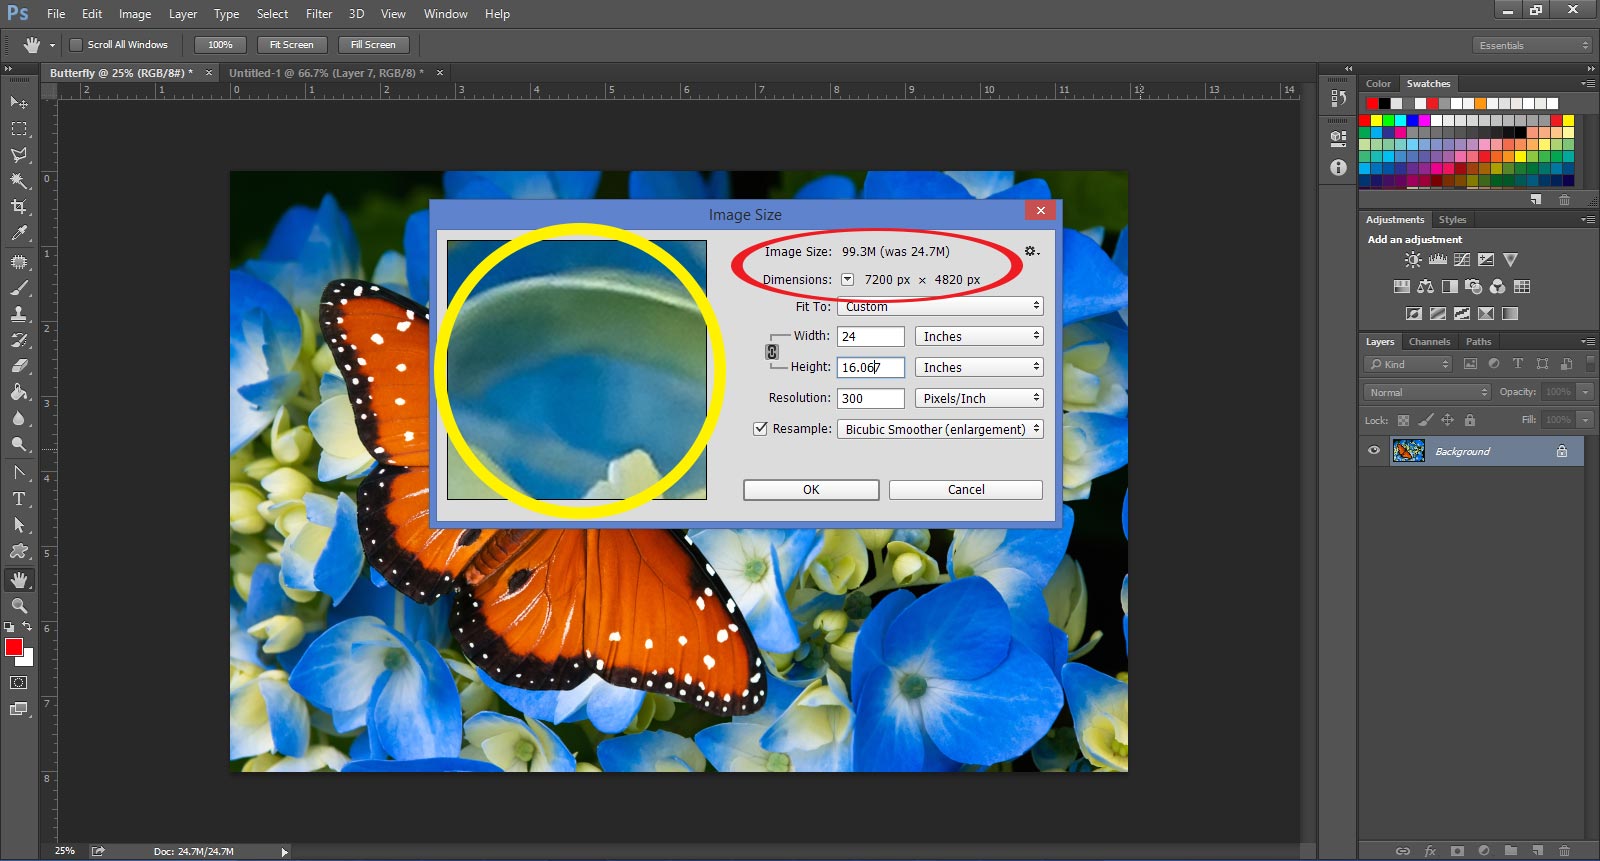
Now that you have done this go ahead and change the width and height to the dimensions you want to print your image at. In this instance I increased it to approximately 24×16 inches. Photoshop will then create pixels which were not present before and make your image a higher resolution file. The downside is while it will now be a higher resolution file, the resulting print may still not be as sharp and clear as it would have been in a smaller print size. Notice a couple things here. In the yellow circle we see what happens to the image when it is enlarged. It becomes a bit pixelated around the fine edges. Also notice circled in red the pixel dimensions have increased as well as the file size. That is because we made the file bigger by adding pixels to it.
So the question is would I print this image after makng these changes. Yes, and I would get decent print but just not as good as it could be. Stay tuned for our next tutorial in Part 2 which we tell you how you can improve the appearance after enlarging the file so that we can fix the file so that the details look smoother and crisper.
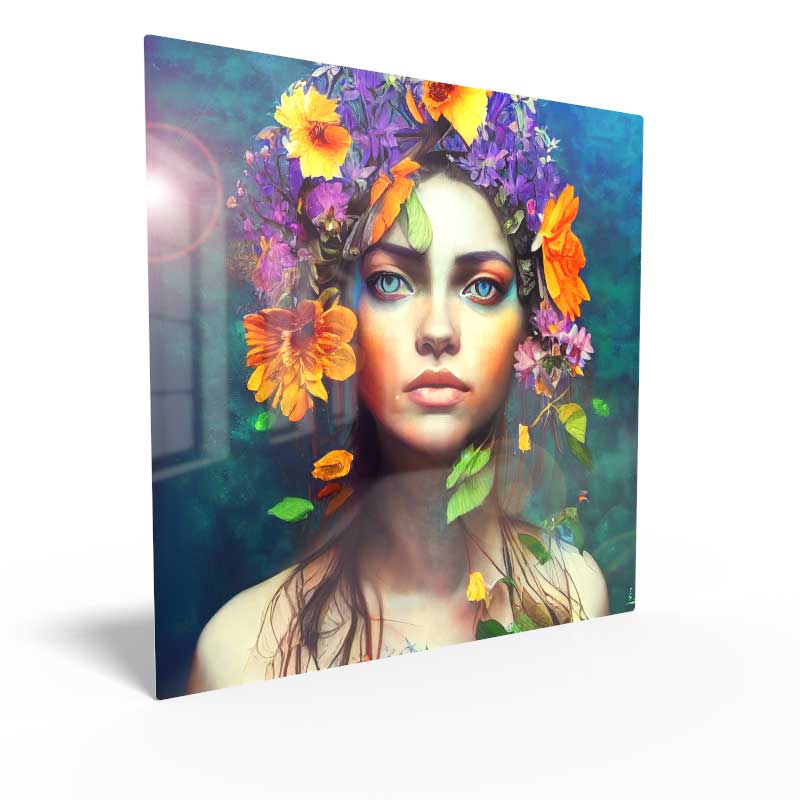
Order HD Chromaluxe® Metal Prints
Print your artwork or photography as custom-size metal prints. Using the dye-sublimation process, your image is fused to the surface of rigid aluminum panels. These provide a modern look when decorating your home or office. Choose from multiple metal surface options. Order it framed, with a float wall mounting or even with a tabletop easel back.