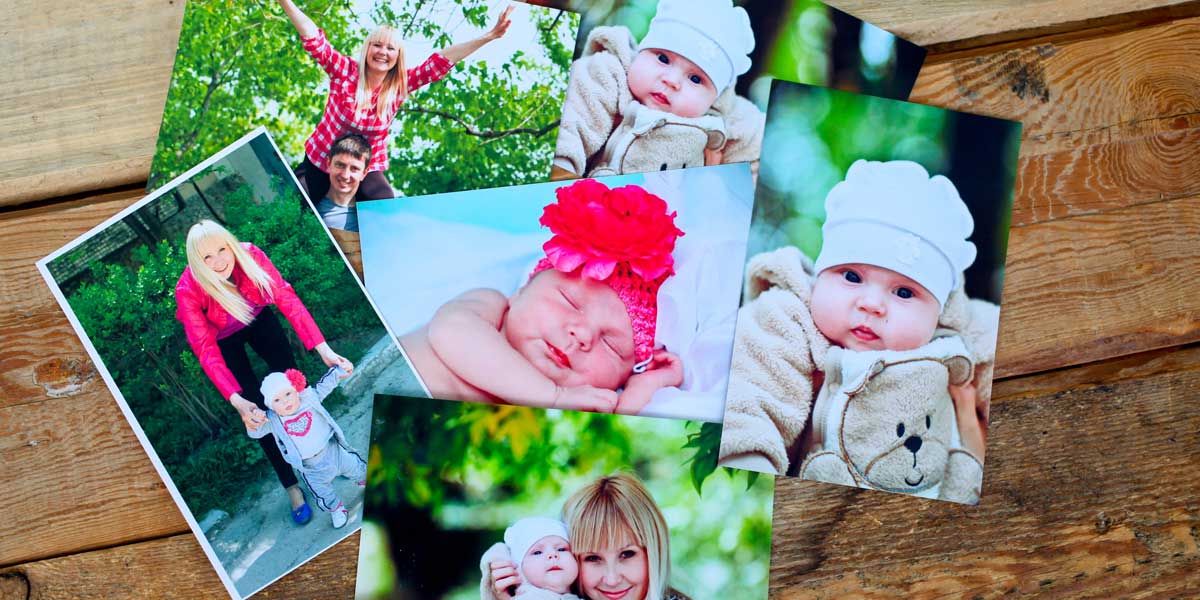
I think one of the reasons that FinerWorks attracts the initial interest of photographers who are used to working with their local photo lab is the idea of bordered prints. Artists doing reproductions on their work tend to prefer bordered prints as well however there are times when a borderless print is opted for instead. For some types of prints, this may even be the only option. There are 3 tips I think will help anyone planning on producing a borderless print or card.
Before we discuss those, let me start by defining what we mean by a borderless print. In this case we are talking about a full-bleed print. Unless you have included it as part of your image, you won’t see any sort of white border or around the picture. The image spans the entire surface of the cut sheet of paper.
1. Bleed & Safe Zones
Possibly the most important thing to consider with any borderless prints are bleed and safe zones. Bleed in the print world is the process of having an image print slightly larger than the final cut size. This means if you are going to produce a 12×8 inch print then the image has to actually be printed slightly larger, then cut down to the exact size. This is especially important for us who have to cut thousands of giclee prints of varying sizes each day. And it has to be done quickly by actual people, manually by hand.
The other issue is the safe zone. With the exception of the Kodak prints, the cutting technology is not always as precise, so you want to not rely strictly on where the bleed cuts begin. You also want to give yourself a buffer or “safe zone”. This is very important with some printing where there is either manual cutting or the automatic cutting is less precise. It also makes sure that if your giclee prints are framed, important subject matter is not covered by the frame’s lip.
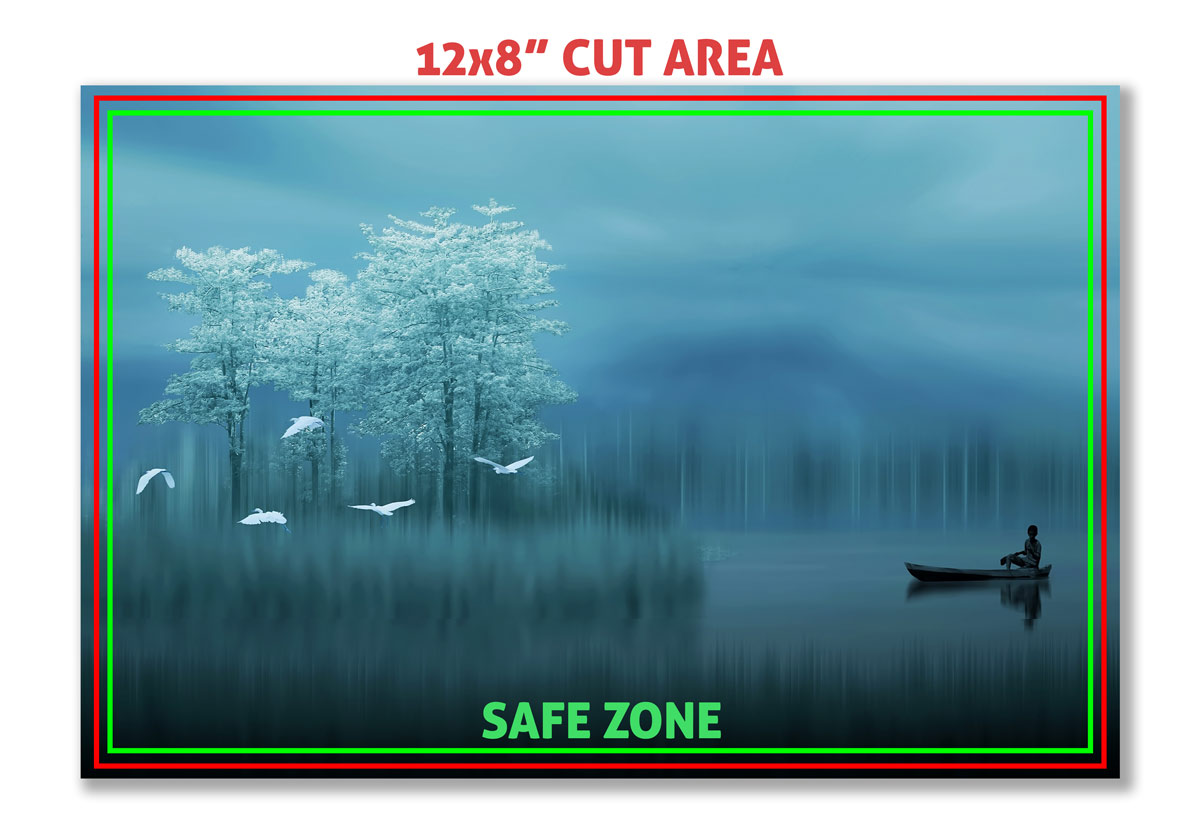
One other thing we do at FinerWorks that may be different elsewhere is we try to keep the bleed requirements less. Through a combination of both proprietary production methods and a talented production staff, we are able to minimize the amount of bleed requirements for borderless prints. Some companies will enlarge your image to up to ¼ inch so they have enough bleed for them not to worry about inaccuracies with their equipment or whoever is doing the cutting if done by hand, however at FinerWorks we try to keep it closer to 1/8 inch and even smaller on some things. While it can be harder to cut, we want to preserve as much of the artist’s work as possible.
Why is it necessary to require bleed for borderless prints in the first place? To answer that you must understand the cutting process. There are a wide range of tools printers use to cut prints, some more precise than others however most have a small level of tolerance. This means if trying to cut directly on the edge it can be off by a couple of millimeters. That might not seem like enough to notice, but it can stick out like a sore thumb if the image positioning is even slightly off and there was no bleed to compensate for it. Imagine having a fairly dark print produced but because of the lack of bleed a millimeter or two of the underlying paper white is visible on one side. Yes, I know the lip of a frame or even matting would hide that sliver of white on the edge, but not everyone provides prints to their recipients in a frame and it definitely does not warrant the look of a professionally produced print.
2. Be Careful of Adding Borders or Small Embedded Margins
Embedded borders & margins are essentially borders you create within your image. They are a great way to accent the image on the cut sheet but it can create potential problems for smaller margins or where a border is too close to the edge. As an example, a small print which has a cut off by just few millimeters can be noticeable as illustrated here with this 4×5 card.
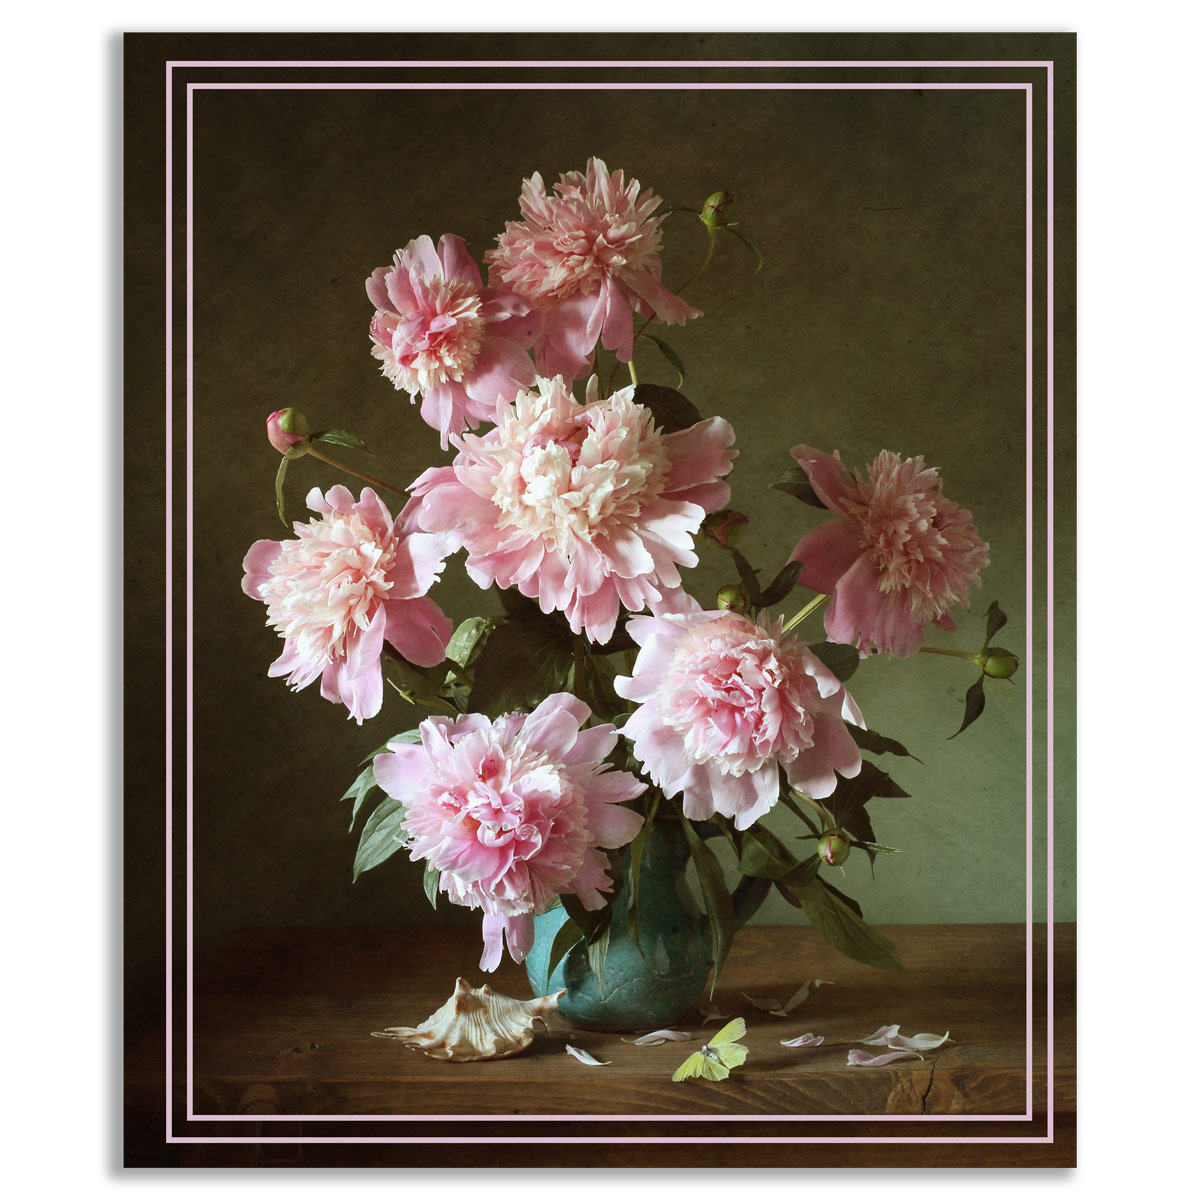
Now cards are cut by machine and pretty accurate but even a couple of millimeters is enough to make the pink border added to the image noticeably off center if the paper shifts just the slightest bit while going through the cutting. On a giclee print it can be even more difficult since those are typically cut by hand.
3. Framing a Borderless Prints
On occasion we have customers contact us and ask us about framing. Should they use matting, should they put it behind glass, etc. Personally I have started to prefer framed prints without glass anyway since I want people to be able to appreciate the texture of the papers I use but consider the implications around the size of the frame and if you do put a print behind glass.
First, if you have a borderless print, don’t put it in a frame with an opening of the same size, if you can avoid it. In other words don’t put an 8×10 print in an 8×10 frame. It looks less refined and may have to be cut down further if the size of the frame or cut print is even off by a few millimeters. Usually with frames you will find the opening just a little bit larger so if your print size is also cut too large it won’t be that big of a deal. But sometimes the size the print and insert can be too close. I have some personal experience with this a long time ago before FinerWorks. Back then I had a company make me some 8×10 prints that I had sold as a framed collection.
I went to a local art supply store and picked up several frames which had a glass pane to protect them. When I went to frame the prints, I discovered a few of the prints were larger by a tiny fraction of an inch so would not fit in the frame. To fix this I had to shave off a slight amount of the print and get it to fit. It was no big deal to take a straight edge and knife to trim them but it would have been annoying if I had to do this to all of them.
Other issues I probably should have also considered was the fact the prints were in direct contact with the glass since no matting was used. If you frame your prints with FinerWorks, this won’t be a problem since we use spacers to prevent this but without the, overtime the print can be harmed by being in direct contact with the glass
You will likely want to utilize a ph-neutral/acid free matting since that acts as a buffer and keeps the print front directly contacting the front. The only problem is with borderless prints you do not have a lot of print to attach to the back of the matting. Fortunately, most professional mats will have an opening which is about a quarter of an inch smaller than the print so you don’t have to worry about the print falling through. But keep in mind that this smaller opening means even more of the print is hidden. So if you had a signature right on the bottom edge that was already almost trimmed away when removing the bleed, there is a good chance that signature would be partially covered by the time it was matted. Generally, my advice to people who do intend to frame and mat their prints is to stay away from borderless. There is no point to having a borderless print in that instance. Plus, you avoid the bleed factor and have more of the print that you can secure to the back of the matting.
My Conclusion
I should admit I tend to be a little biased about borderless prints. Frankly I don’t like them, they are a pain to work with an look less appealing than a bordered print. A border tends to accent a print and is normally preferred with any sort of art reproduction since it gives you an additional space to sign your prints. With that said, there are times that a borderless print option is going to be your best choice or even necessary as in the case with a print that has to be mounted. If you do prefer a borderless print just be sure to consider what was discussed above which I believe will create less headache.
To see another visual description of bleed as it pertains to printing, also checkout this brief video below:
Giclee Printing at FinerWorks
One of the largest ranges of paper selections, while using the highest level of archival print technology allowing superior detail and color, you can create custom giclee prints of your artwork and photos.